Active Directory Homelab
My goal for this project was to set up an Active Directory homelab to simulate a small-scale enterprise environment and gain hands-on experience with Active Directory. To help set up the lab, I used several Active Directory homelab tutorials, including a YouTube tutorial by Josh Madakor. I also did some of my own experimentation once the lab was set up. This write-up documents my experience setting up the lab, experimenting with Active Directory, and learning about domain administration.
Getting Started
Here’s a list of the resources I used to create this lab:
Setting Up The Lab
Setting Up Windows Server 2019
Step 1: Create Windows Server 2019 VM
The first step in setting up the lab was to create the Windows Server 2019 VM. In VirtualBox, I created a new VM using the Server 2019 ISO and assigned it 4GB of Ram and 50GB of virtual hard disk space. I also assigned the VM 2 network adapters.
Network Adapters -
- Network Adapter 1 (NAT)
- Network Adapter 2 (Internal)
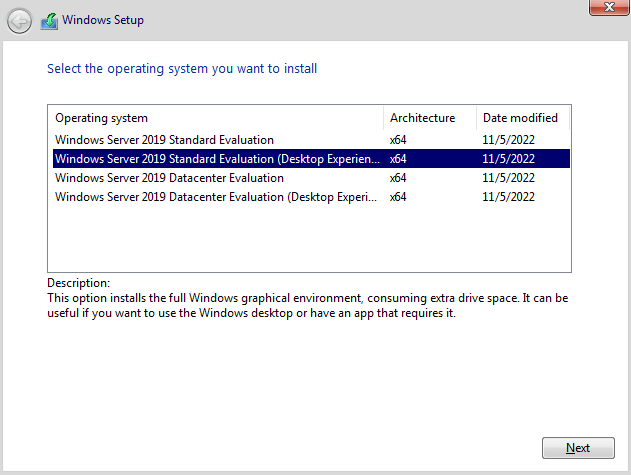
Step 2: Install Windows Server 2019
After creating the VM I went ahead and began the installation process. I chose the “Standard Evaluation (Desktop Experience) option and proceeded with the installation.
Step 3: Rename PC
After the installation was complete, I renamed the PC to “Server2019” by going to settings > system > about > rename this PC.
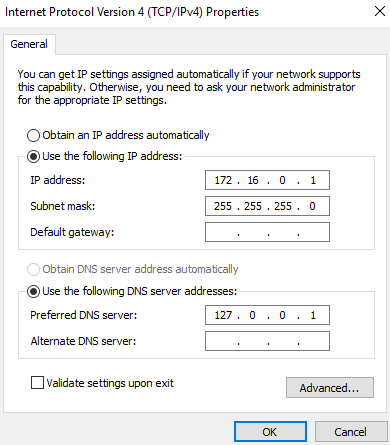
Step 4: Configure Networking
In this step, I configured the network adapters, and assigned the internal adapter the static IP 172.16.0.1. To assign the static IP I went to the network and sharing center > change adapter settings > right-click adapter > properties > IP version 4. Later on I will set up a DHCP server to simulate an enterprise network.
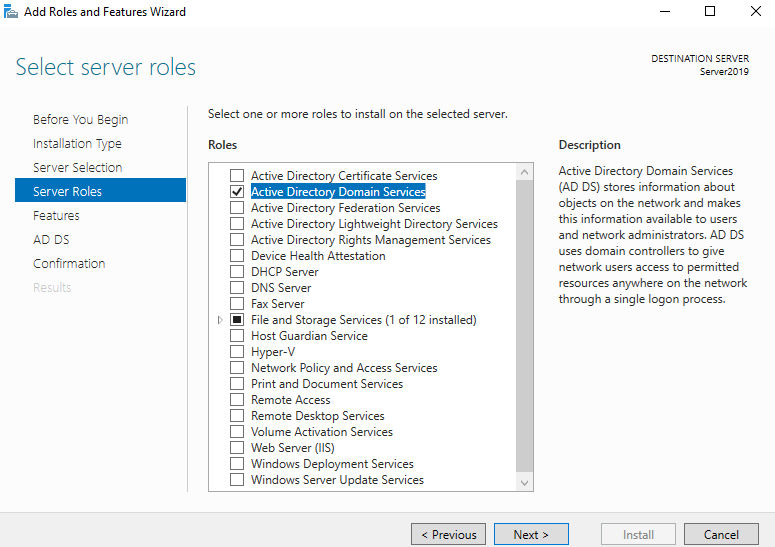
Step 5: Install Active Directory Domain Services
Next, I installed AD DS through the server manager dashboard by going to add roles and features and choosing Active Directory Domain Services under server roles.
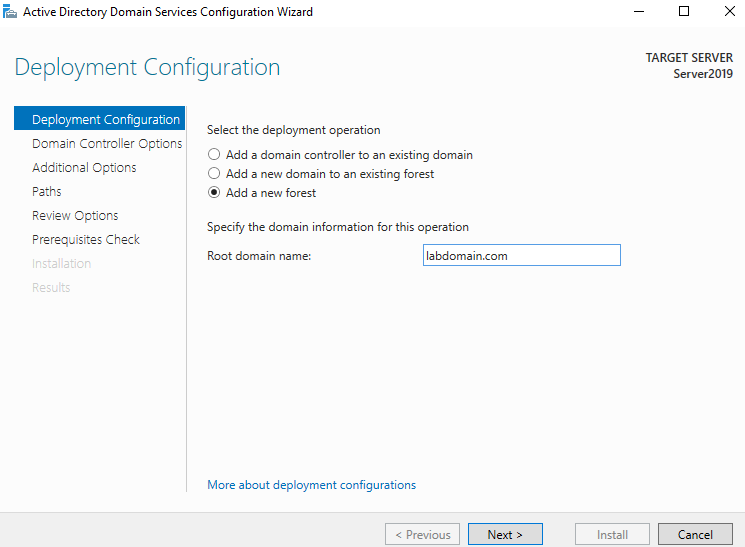
Step 6: Create Domain
I created a domain for the lab named “labdomain.com”. I did this by going to post-deployment configuration > promote this server to a domain controller > add a new forest.
Step 7: Install RAS and NAT
Next, I installed and configured RAS and NAT on the domain controller. On the server manager dashboard, I went to add roles and features and checked remote access under server roles and routing under role services. Next, I installed NAT by going to the server dashboard > tools > routing and remote access > right-click Server2019 > configure and enable routing and remote access > NAT.

Step 8: Install DHCP Server
In this step, I installed the DHCP server by going to add roles and features on the server manager dashboard and selecting DHCP server under server roles.
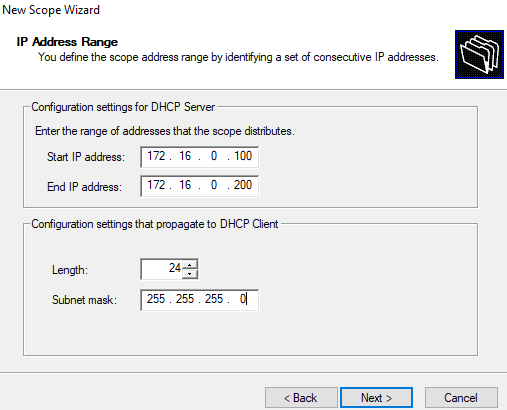
Step 9: Configure DHCP Server
Once installed, I configured the DHCP server by going to the server dashboard > tools > DHCP server. Once opened, I right-clicked IPv4 and selected new scope, then configured the name, address, and subnet mask of the scope. Next, I set the lease time to 8 days, configured the router address, set the domain controller as the dns server, and activated the scope. Finally, I right-clicked the DC and authorized it.
The Server 2019 DC setup is now complete.
Setting Up Windows 10 Clients
Step 1: Create Windows 10 Pro VM
Now that the DC is set up, the next step is to create a Windows 10 VM to act as a client. For the network settings, I assigned the Windows 10 VM 1 internal network adapter.
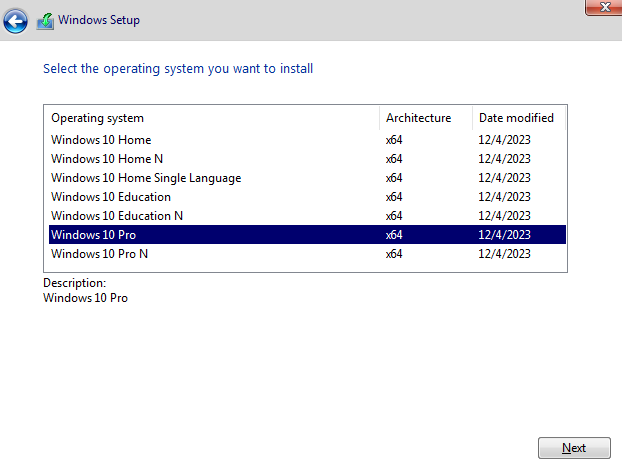
Step 2: Install Windows 10 Pro
In this step, I installed Windows 10 Pro on the client VM.
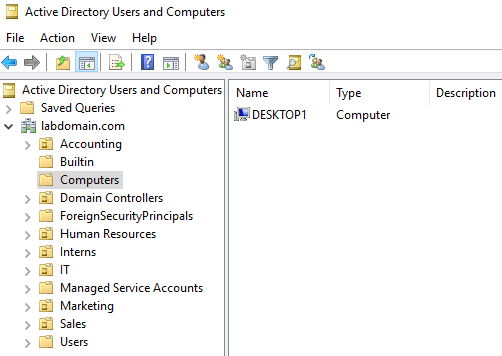
Step 3: Rename PC and Join Domain
After the installation was complete I renamed the PC to “Desktop1” and joined the domain. I did this by going to system > about > rename this PC (advanced) > computer name > change, and entering the proper credentials. The join was successful, and Desktop1 appeared under computers in the active directory users and computers tool on the DC.
Step 4: Verify Desktop1 Obtained Valid IP Address
Next, I verified that Desktop1 obtained a valide IP address from the DHCP server. I did this by running the ipconfig command on Desktop1 and checking the DHCP address leases on the DC.

Step 5: Set Up Desktop2 Windows 10 Client
In this last step, I set up a second Windows 10 client named “Desktop2” by repeating the steps used to set up Desktop1.
Managing and Configuring Active Directory
This section provides an overview of my steps in managing and configuring the Active Directory domain lab environment.
Creating Organizational Units (OUs)
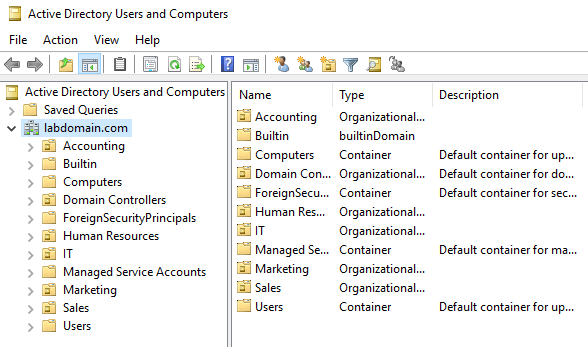
The purpose of an OU is to organize objects in the domain. To create an OU, I went to the active directory users and computers tool and right-clicked the domain name > new > organizational unit. I created 5 OUs called IT, Sales, Human Resources, Marketing, and Accounting.
Creating Domain Users
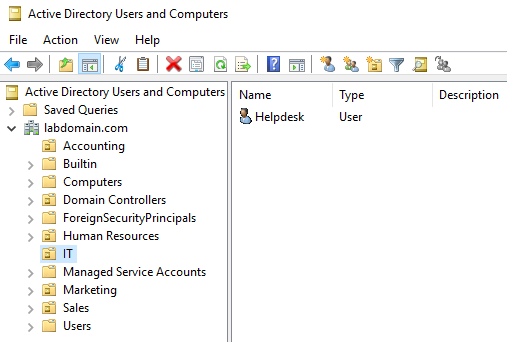
In this section, I created some domain users in active directory users and computers by right-clicking the domain name > new > user. I set each user’s login name as their first initial and last name, and created a user account named “Helpdesk” to be used as an admin account.
Add User Helpdesk to Domain Administrators
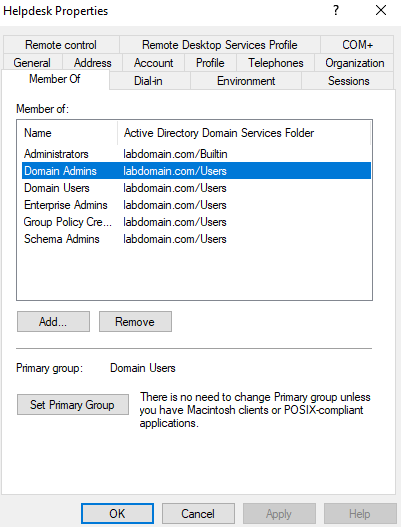
Next, I added the “Helpdesk” account to the Domain Admins group by going to active directory users and computers, selecting the Helpdesk account, going to the member of tab, and clicking add. This will allow the Helpdesk account to be used as an administrator.
Test Domain User Accounts / Delete Local Accounts
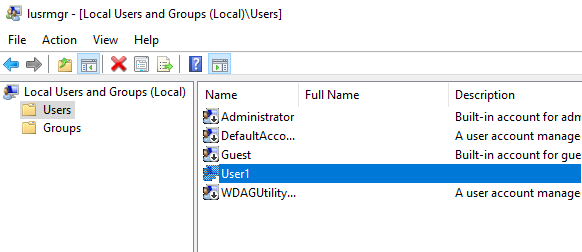
I tested the domain user accounts by logging into Desktop1 as user Patty King. Then, I removed the local accounts on both clients that were created during installation.
Finding Users in Active Directory Users and Computers
There is a helpful “Find” tool in active directory users and computers that can help you quickly search for a user. To test this out, I searched for the user “Patty King” by right-clicking the domain name, selecting find, typing the name in the box, and clicking find now.

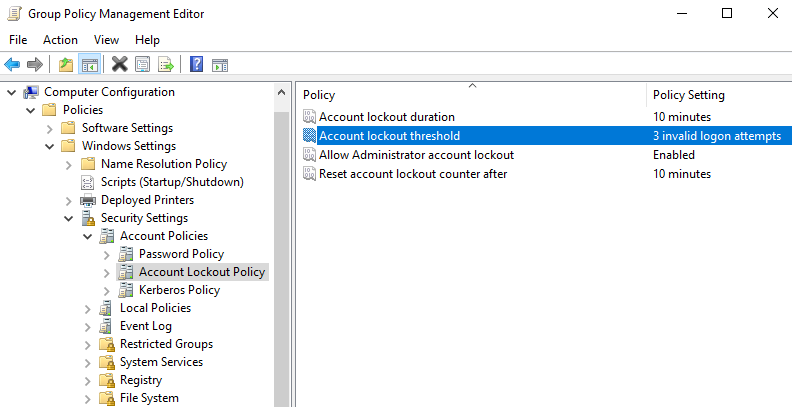
Configuring Account Lockout Threshold Group Policy
To experiment with group policy, I configured the account lockout policy to lock user accounts after a set number of invalid login attempts. I configured this by going to the group policy management tool > domains > right-clicking default domain policy > edit. I then accessed the policy as shown below and set the value to 3.
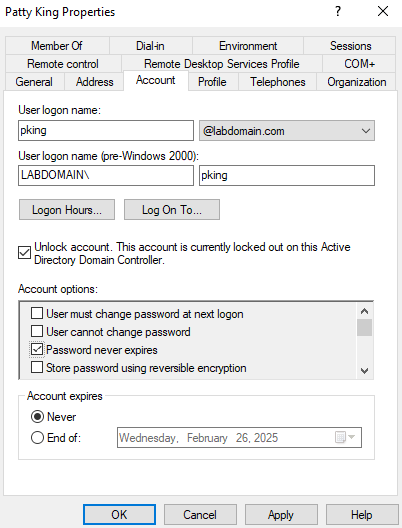
Unlocking User Accounts
After configuring the account lockout threshold group policy, I decided to practice unlocking user accounts. I simulated domain user Patty King being locked out of her account and unlocked it by going to active directory users and computers, clicking on the user profile, going to the account tab, selecting unlock account, and clicking apply.
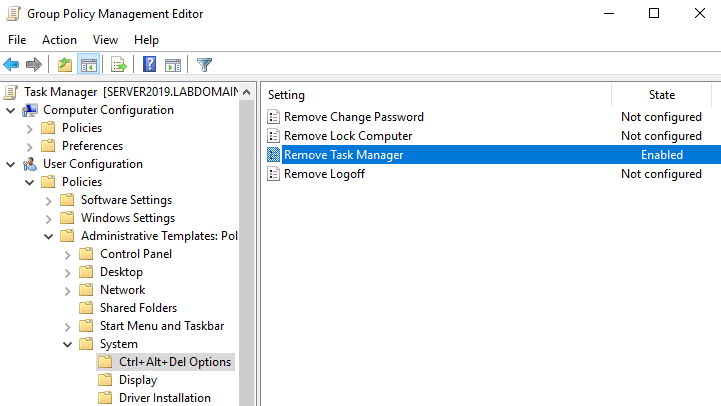
Creating Group Policies
In this section, I practice creating a group policy to remove the user’s ability to access Task Manager. I created the group policy by going to the group policy management tool > domains > group policy objects > right-clicked new > and named it “Task Manager”. Once it was created, I clicked the object, went to the delegation tab, and added the user “John Williams”. Then I right-clicked the object > edit > user configuration > policies > admin templates > system > ctrl + alt + del options > enabled remove task manager > and enforced the object.
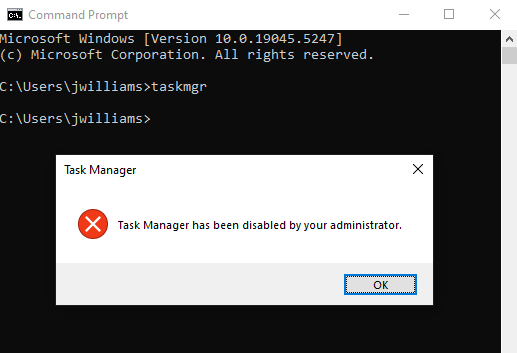
Finally, I logged onto Desktop1 as “John Williams” to verify the group policy was applied. I verified the policy was applied by running the taskmgr command, which triggered a task manager blocked window. Some other useful commands for group policy include gpresult /r to display the gp result, and gpupdate /force to update any changes to group policy.
Enable / Disable User Accounts
I practiced enabling and disabling user accounts by going to the active directory users and computers tool, right-clicking the account, and choosing “enable” or “disable” as necessary.
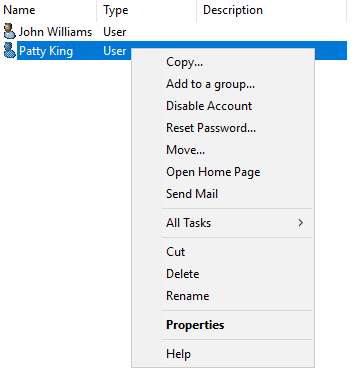
Resetting User Account Passwords
Next, I practiced resetting user account passwords in active directory users and computers by right-clicking the user profile and selecting reset password. You also have the option to require the user to change the password at next logon. I tested this by resetting the password for user “Patty King” and verifying the password change process during logon.

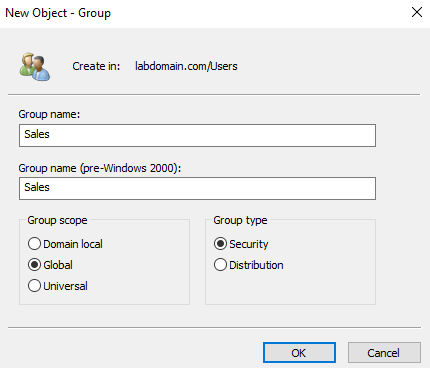
Creating Security Groups
Security groups allow you to manage permissions more efficiently by assigning permissions to the group and adding users to that group, rather than managing individual user permissions. I created a security group called “Sales” for the Sales OU by going to active directory users and computers > right-clicking users > new > group. Once created, I went to the properties members tab and added the Sales OU users to the security group.
Creating a Network Share Drive
I created a share drive for the Sales OU by going to the server dashboard > shares > right-clicking new share > and completing the new share wizard. Next, I added the Sales security group to the share by going to the file explorer > shares > right-clicking Sales share > properties > security > advanced > disable inheritance > add > select a principal > adding the Sales group > and clicking apply. Lastly, I modified the share permissions to read/write.

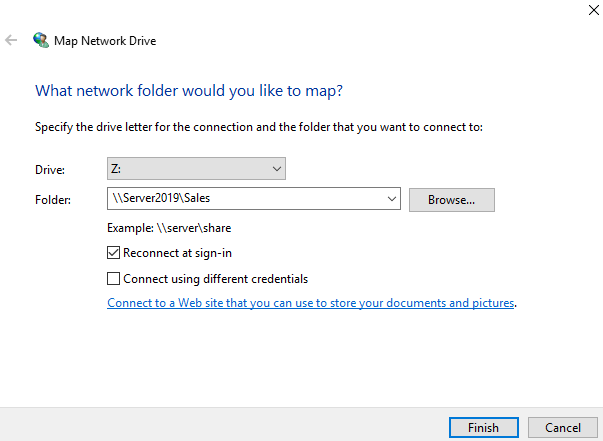
Map Network Drive
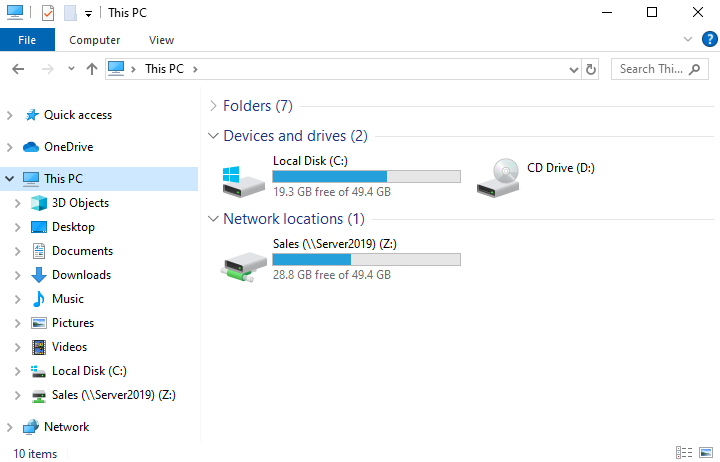
After creating the Sales share drive I went through the process of mapping the drive for the Sales OU users. First, I logged in as the Sales OU user “Patty King” and mapped the drive by navigating to file explorer > this PC > computer tab > map network drive > and filling in the map network drive window. Finally, I finished mapping the drive for the rest of the Sales OU. Alternatively, you can map a network drive using the net use command in command prompt.
Once the drive mappings were complete, I verified that the share drive was visible to the Sales OU users.
Remote Desktop Protocol and Connection
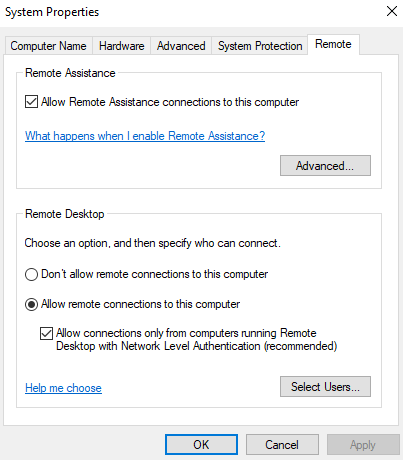
Remote Desktop Connection is a useful admin tool that can be used to provide remote assistance. I used the remote desktop connection tool on the domain controller to connect to the Desktop1 client. To do this, I first logged in to Desktop1 using the “Helpdesk” admin account and allowed remote connections.
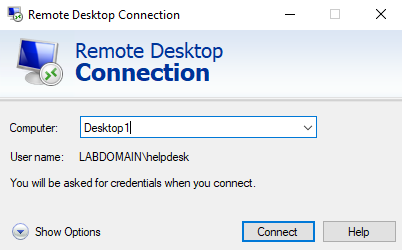
Then, I opened the remote desktop connection tool on the domain controller and entered the necessary admin credentials to connect to Desktop1.
Installing RSAT Tools
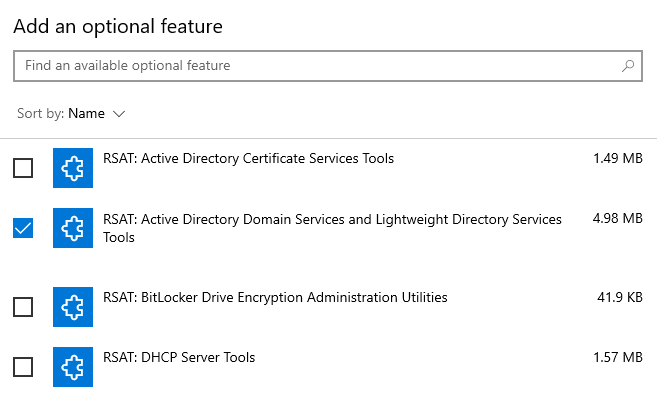
RSAT tools is a useful tool that allows you to remotely manage certain features of Windows Server. I installed RSAT tools on Desktop1 by going to settings > system > optional features > add a feature > and choosing RSAT: Active Directory Domain Services and Lightweight Directory Services Tools.
Account Delegation Control
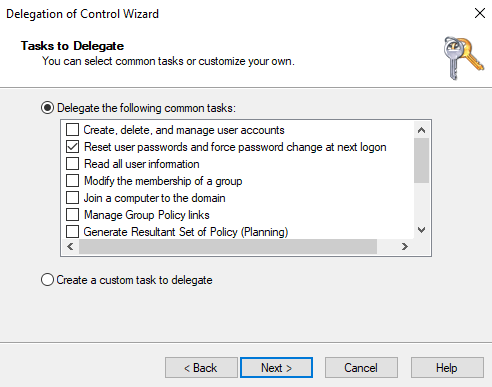
In this step, I created a user account named “Helpdesk Intern” and delegated control for them to reset user account passwords. I did this by going to active directory users and computers > right-clicking domain > delegate control > and selecting the reset user passwords task. Lastly, I verified this by logging in to Desktop1 as “Helpdesk Intern” and was able to reset user passwords, while being denied the ability to perform other tasks outside of the assigned permissions.
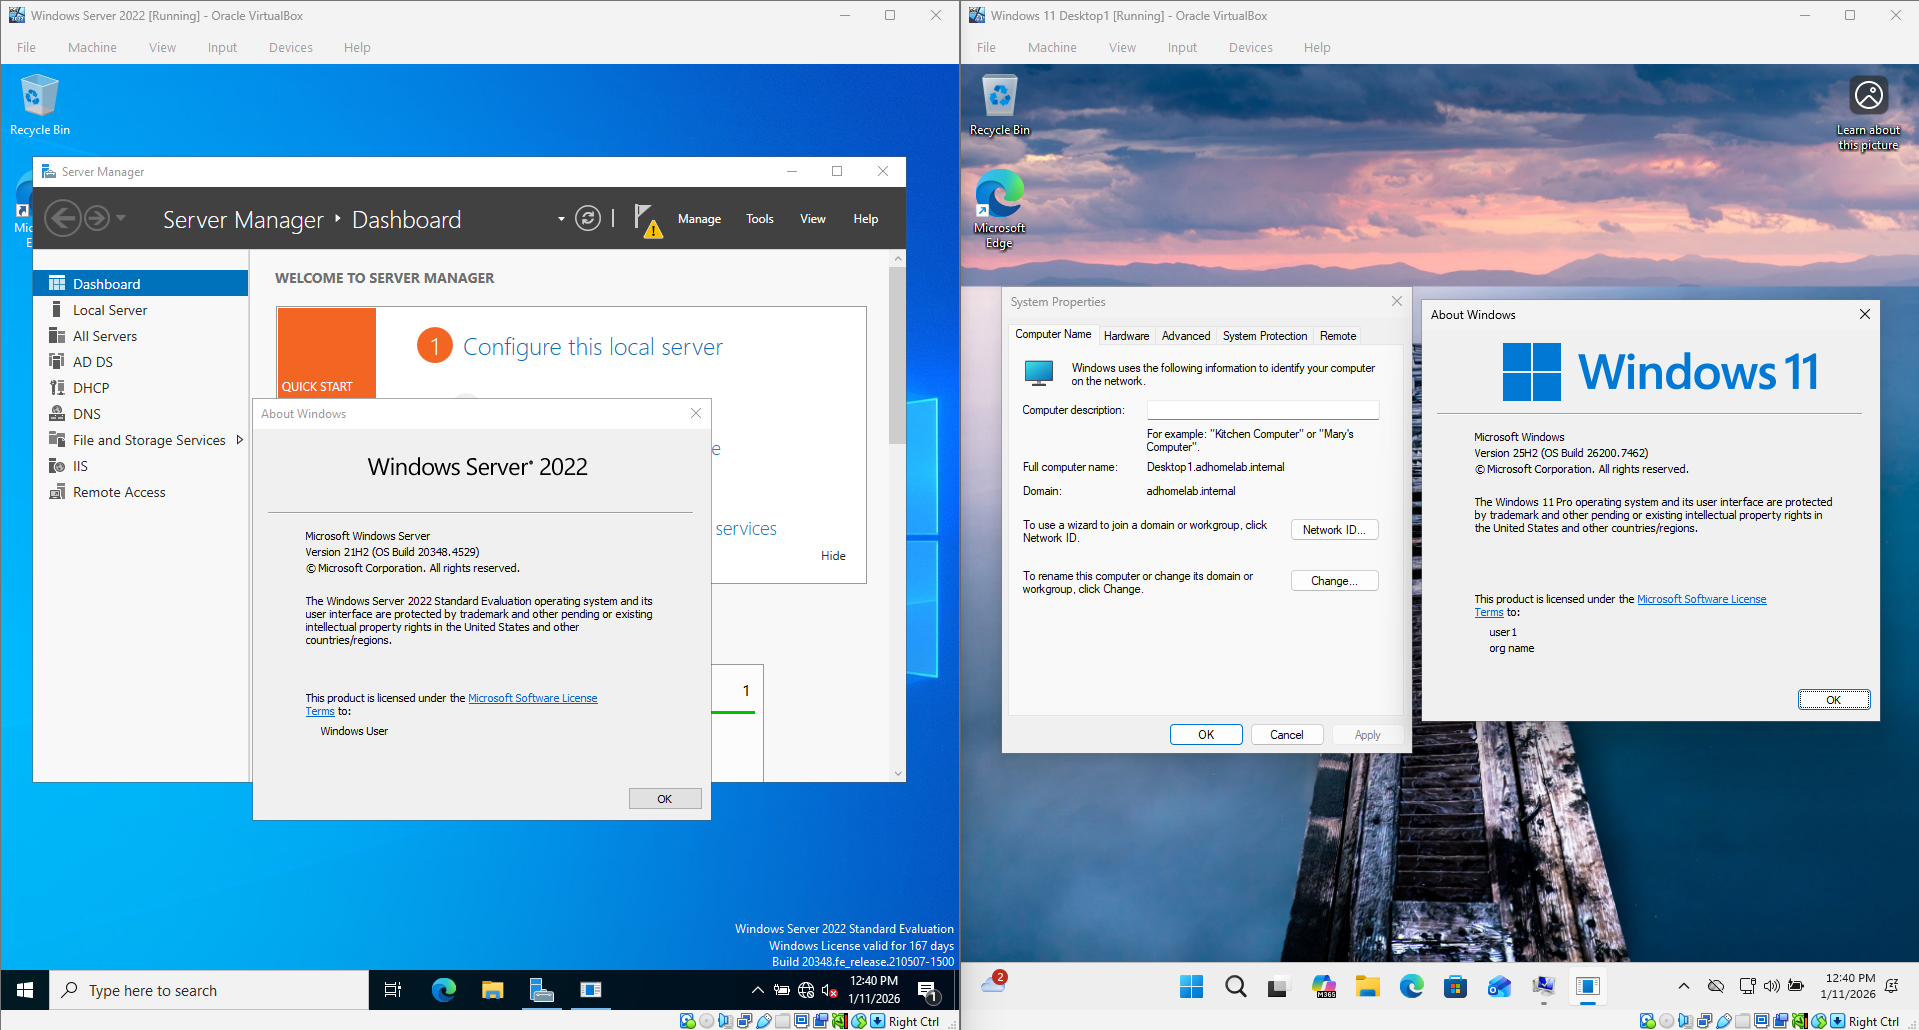
AD Environment Update (Windows Server 2022 & Windows 11)
The latest major change I made was rebuilding the Active Directory environment using Windows Server 2022 and Windows 11. I rebuilt the environment almost exactly the same, except for changing the domain name to adhomelab.internal, assigning the internal network adapter a static IP of 10.0.0.1, and changing the DHCP scope to 10.0.0.100-200. This process helped me practice installing the necessary tools and services and configuring the environment. The screenshot below shows the Windows Server 2022 VM on the left and the Windows 11 domain-joined VM on the right.