Adding a custom domain to GitHub Pages
In this post, I’m going to go over the steps I took to add a custom domain to my GitHub Pages site.
Step 1: Register domain
The first thing I did was register my domain, aaronjadkins.com, with Porkbun.
Step 2: Add domain to GitHub Pages
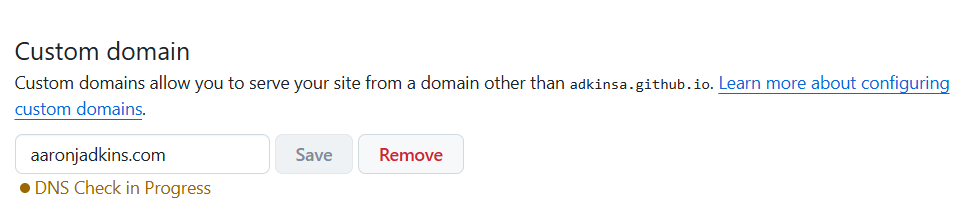
I added my domain to GitHub Pages by going to my GitHub Pages repository > settings > pages (under code and automation), typing aaronjadkins.com into the custom domain field, and clicking save. It then showed that a DNS check was in progress.
Step 3: Configure DNS records
The next step was to configure the domain’s DNS records. This process was fairly simple thanks to Porkbun’s quick DNS configuration. However, if your domain registrar doesn’t have a quick DNS configuration, you can refer to the GitHub Pages documentation for help with managing DNS records.
To configure the records, I navigated to the domain management settings on Porkbun and clicked on DNS records. Then I scrolled down to the quick DNS configuration section and clicked on GitHub.

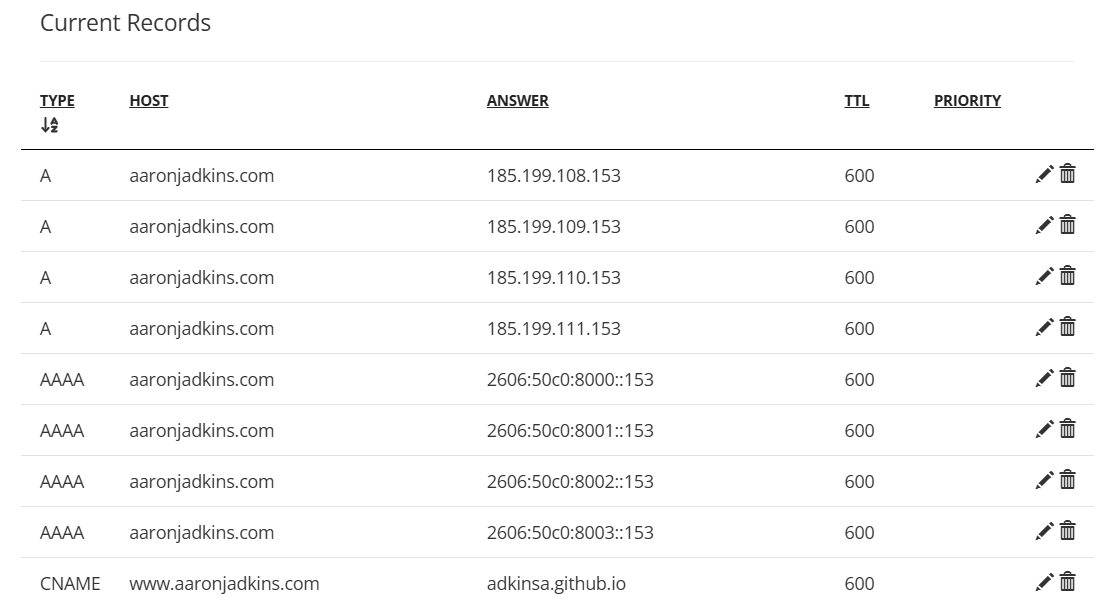
This added the standard A and AAAA records, and for the CNAME record, I set the host value to www.aaronjadkins.com and the answer field value to adkinsa.github.io. After I was finished, this is what the DNS records looked like:
Step 4: Update URL in _config.yml
Next, I went to the _config.yml file in my sites root directory and updated the URL to https://aaronjadkins.com.
Step 5: Enforce HTTPS
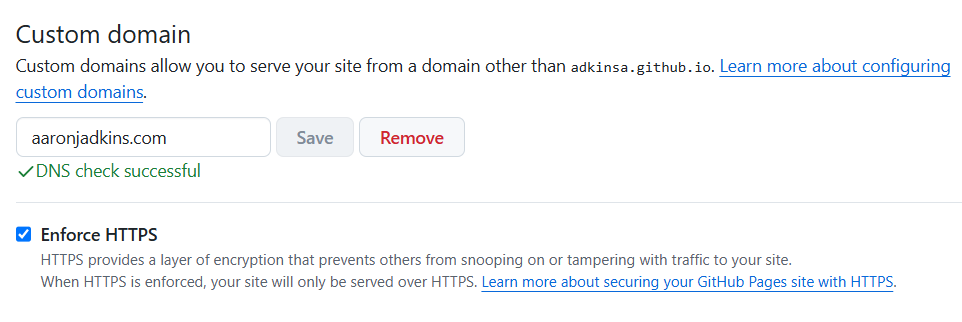
Finally, once the DNS check was successful, I selected the option to enforce HTTPS.
The site is now live at https://aaronjadkins.com/.